
How to Replace Idler Pulley 2000-09 Subaru Outback
Created on: 2012-08-20
Learn how to remove and install the serpentine belt and the tensioner pulley if it's squealing or broken. Our experts will show you what the steps are
-
step 1 :Remove the serpentine belt
- Use a 10 mm socket and ratchet to unbolt the belt and pulley shield.
- Loosen the two 12 mm tensioner adjusting bolts.
- Locate your serpentine belt routing diagram or draw one out.
- Remove the serpentine belt.
-
step 2 :Remove the belt tensioner pulley
- Use your socket, rachet and extension to loosen the adjustor bolts to remove the AC compressor belt.
- Unbolt the belt tensioner assembly.
- Use a hammer to remove the pulley from the assembly.
-
step 3 :Install the new pulley
- Install the new pulley to the tensioner assembly.
- Bolt the tensioner assembly back in.
- Replace the AC compressor belt and tighten the adjustor bolts.
- Route the serpentine belt back on, using your routing diagram
- Tighten the tensioner adjustor bolts
- Bolt the cover back on.
Tools needed
-
12mm Socket
Socket Extensions
Flat Blade Screwdriver
10mm Socket
Ratchet
Brought to you by 1AAuto.com, your source for quality replacement parts and the best service on the internet.
Hi, I'm Mike from 1A Auto. I hope this how-to video helps you out, and next time you need parts for your vehicle, think of 1aauto.com, thanks.
In this video we are going to show you how to replace the pulley that's on the tensioner on the air belt. It's the belt that spins the AC compressor on this 2003 Subaru Outback. The only tools you will need are 10mm and 12mm sockets with a ratchet and a 6 inch extension.
Use a 10mm socket ratchet or a wrench and remove two bolts; one here, and one over here. There may also be a nut here that seems to be missing on my vehicle. Now I'm using a 12mm socket with an extension and a ratchet. I am going to loosen this bolt here. It basically allows the shield to come right off. Then there's another 12mm bolt right under here, under this adjusting bolt. Loosen that, and then loosen this bolt.
I will fast-forward here as I loosen that adjusting bolt, and as you loosen it you will see the belt start to loosen. You do usually need to loosen it way up in order to peel that belt off the alternator, and then remove it. Then pull the belt right off. Down here, you are going to want to loosen this bolt here. A 12mm, I've got an extension on here, it just makes it a little easier on the adjustment bolt here. Turn that counter clockwise. Again, just fast forward it here as you turn that bolt counter clockwise. Again that belt will loosen up until you can take it off of the AC compressor and then the crank pulley as well.
To take this whole assembly off, you will want to undo these two bolts here and then remove this nut. That allows that to come off. Now you need an elevated surface, like a block of wood or something, and a hammer. Then you just want to put the edge of the pulley on the surface and drive that out. Then drive that little pin out. Using the new pulley from 1A Auto, put this through the hole, first. Then, that goes back through. Make sure that the rectangular part of the bolt comes through, that's what holds it in place, and then put the nut back on. You can do it finger tight for now, it needs to be able to slide still. We will bolt this back into place. Fast forward here as I put that bracket down into place. I start with both of the bolts in first, and then tighten them up with my socket ratchet.
You probably want to loosen up your tensioner bolt all the way, pushing the belt right down in. The belts on this car are actually fine; I just need to replace the tensioner. Make sure that it's in the grooves on the crank pulley here. Pull it up and put it in the grooves of your AC compressor, and right on. Then tighten up your tensioner bolt. Then as you start getting it tighter, you want to take the belt, press on it, and you want it to move between 1/8 and 1/4. Then tighten up the pulley bolt down here. Then put some penetrant on here to make it a little easier to turn things. Then loosen this up further and put on my old belt that is still in good shape. New belts from 1A Auto are actually the same length and dimensions so they will go right on. To put it on, sometimes it's easier actually to get it on the two larger pulleys first, then onto the alternator. Make sure it's on all of the pulleys correctly, and now just tighten up the tensioner bolt. Once you have that tightened with about 1/4 of play up and down, tighten up this bolt and lock it in place.
I will fast forward this, here as we finish it up. Put the metal bracket back on, slide it behind that bolt in the alternator and then put the 10mm bolt in the top. Tighten those up and then put the plastic shield back on and use 10mm bolt. Also, there is probably another 10mm nut that was missing on my vehicle that you would need to tighten up.
We hope this helps you out. Brought to you by www.1AAuto.com, your source for quality replacement parts and the best service on the internet. Please feel free to call us toll free: (888) 844-3393. We're the company that is here for you on the internet, and in person.
Shop Products
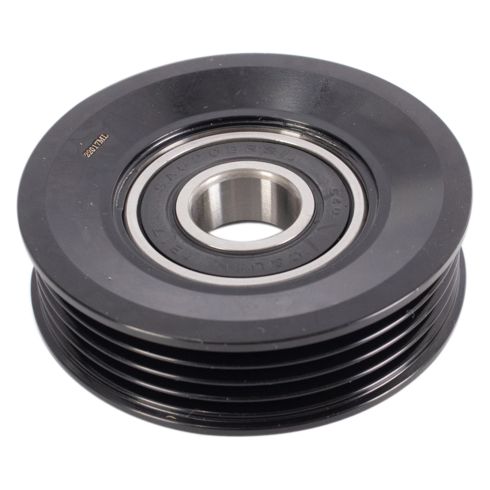
Serpentine Belt Idler Pulley TRQ BPA03857
- 4
- Black
- 1
- Steel
- 20.3 mm
- 70 mm
- 2.76 in
- 17 mm
- 0.8 in
- 0.67 in
- Grooved

How to Replace Serpentine Belt Idler Pulley 2004-13 Jeep Liberty
Learn from 1A Auto how to replace the serpentine belt tensioner idler pulley on your 03-13 Jeep Liberty by watching this detailed step by step video

